Easy-Binding
A Kotlin based library to reduce the Boilerplate code for ViewBinding in Android to bare necessity, to make it easy to use.
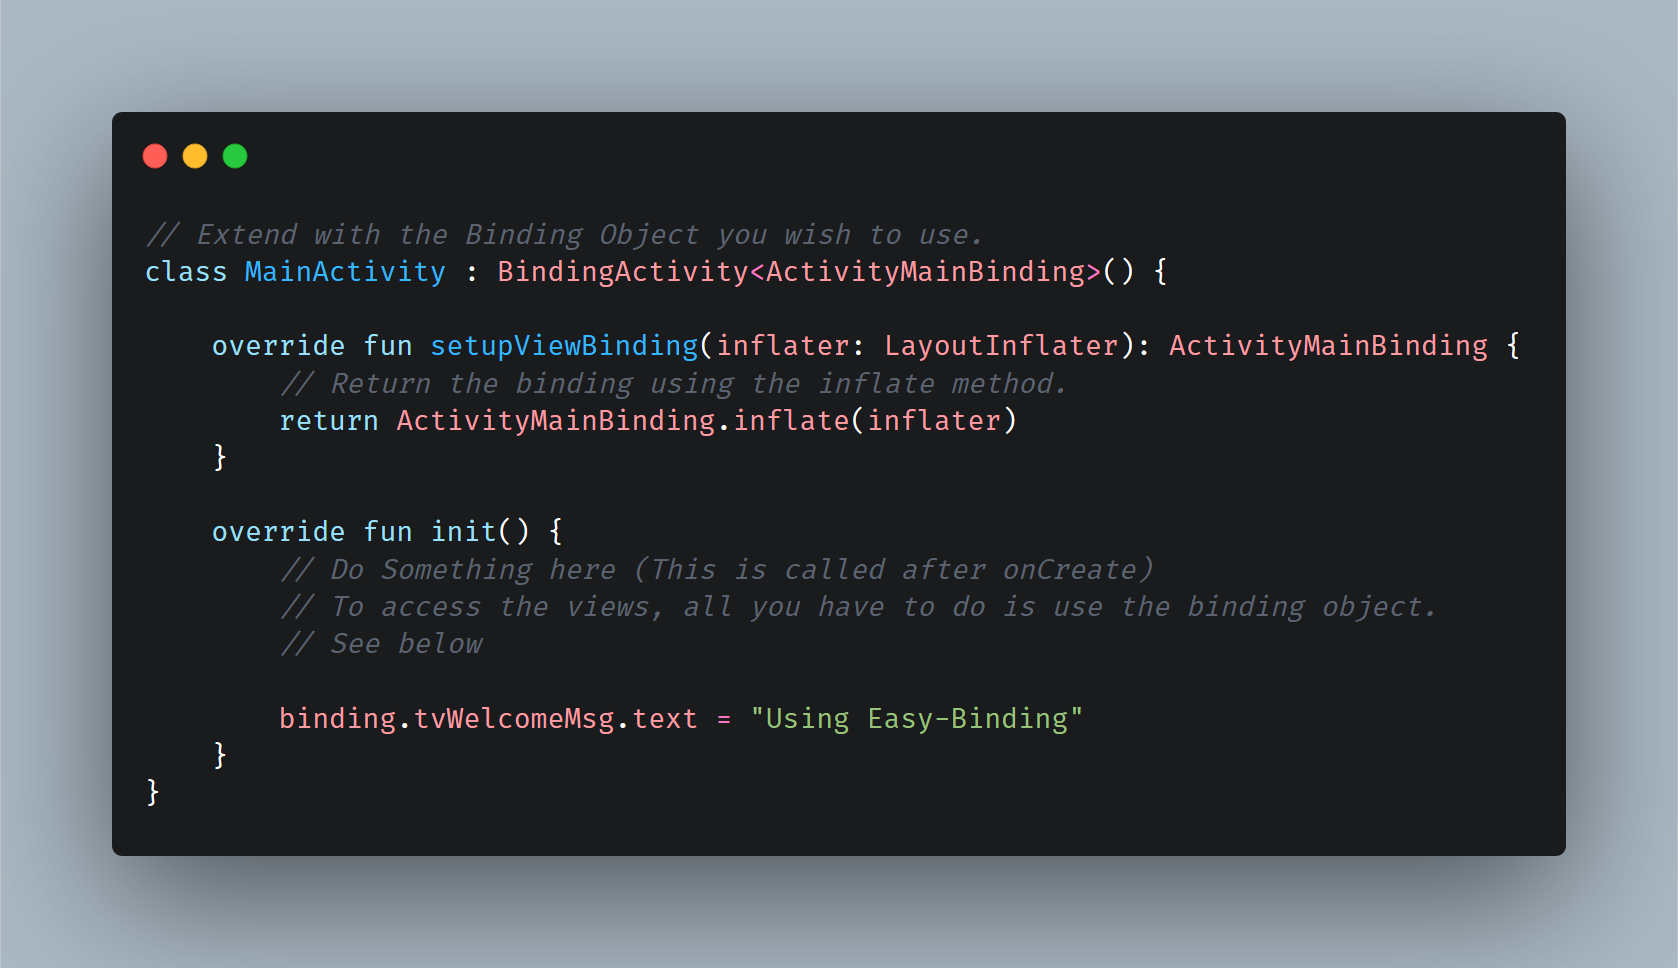
Table of Contents
Gradle Dependency
Before we begin, I have written an article on Medium about this library and its workings. Take a look if that interests you. Let's get started then.
Firstly, and foremostly, you will need to enable ViewBinding for project, so do that in your gradle as follows :
buildFeatures {
    viewBinding true
}
Secondly, make sure, mavenCentral() is added to your build.gradle file, since this library is hosted there, it is needed. Also, with the jCenter sunsetting soon, this will be needed in near future anyway.
repositories {
    mavenCentral()
}
Then afterwards, add this to your app module's build.gradle file (Make sure it is the latest version) :
dependencies {
  implementation 'io.github.chetan-tuteja:easy-binding:1.0.0'
}
The Basics
Make sure to go through the ViewBinding basics before you get started here, so that you know what you are working with.
If view binding is enabled for a module, a binding class is generated for each XML layout file that the module contains. Each binding class contains references to the root view and all views that have an ID. The name of the binding class is generated by converting the name of the XML file to Pascal case and adding the word "Binding" to the end.
Easy-Binding, helps you to remove the boilerplate code needed to use ViewBinding, especially in case of Fragments, by keep it to bare minimum and handling everything else by itself. There are two basic use-cases for this, which are as follows:
For Activites
Let us assume you have a basic activity called MainActivity.kt and it's corresponding XML Layout as activity_main.xml. The generated binding class for such an activity will be called ActivityMainBinding.
To use Easy-Binding, you have to extend your activity file with BindingActivity and pass on the binding class and implement the abstract methods. The following will help make this clearer for you.
// Extend with the Binding Object you wish to use.
class MainActivity : BindingActivity<ActivityMainBinding>() {

    override fun setupViewBinding(inflater: LayoutInflater): ActivityMainBinding {
        // Return the binding using the inflate method.
        return ActivityMainBinding.inflate(inflater)
    }

    override fun init() {
        // Do Something here (This is called after onCreate)
        // To access the views, all you have to do is use the binding object.
        // See below

        binding.tvWelcomeMsg.text = "Using Easy-Binding"
    }
}
That is all you have to do, rest everything is being handled from clearing the binding files, to assigning it and using it. Simply, use the binding object and it shall return all the views present in your XML and it's corresponding Binding Object created.
For Fragments
Let us assume you have a basic Fragment called ExampleFragment.kt and it's corresponding XML Layout as fragment_example.xml. The generated binding class for such an Fragment will be called FragmentExampleBinding.
To use Easy-Binding, you have to extend your Fragment file with BindingFragment and pass on the binding class and implement the abstract methods. The following will help make this clearer for you.
// Extend with the Binding Object you wish to use.
class ExampleFragment : BindingFragment<FragmentExampleBinding>() {

    override fun setupViewBinding(
        inflater: LayoutInflater,
        container: ViewGroup?
    ): FragmentExampleBinding {
        // Return the binding using the inflate method.
        return FragmentExampleBinding.inflate(inflater, container, false)
    }

    override fun init() {
        // Do Something here (This is called after onViewCreated)
        // To access the views, all you have to do is use the binding object.
        // See below

        binding.tvWelcomeMsg.text = "Using Easy-Binding"
    }
}
That is all you have to do, rest everything is being handled from clearing the binding files, to assigning it and using it. Simply, use the binding object and it shall return all the views present in your XML and it's corresponding Binding Object created.
Things To Remember
Since we have to clear out the binding object, especially in case of Fragments, once the views have been destroyed. This is automatically handled with the help of LifeCycleObserver. Even though, still, I have added utility for it by overriding onDestroy or onDestroyView method.
So remember to call the super in case you are overiding these methods for your own use just to avoid any leaks of sorts. Do this, and all shall be fine.
override fun onDestroy() {
        // Override stuff here, but remember to always called super.
        super.onDestroy()
}
override fun onDestroyView() {
        // Override stuff here, but remember to always called super.
        super.onDestroyView()
}
Besides this all that is needed for the app to run is the androidx.appcompat:appcompat dependency which is included in all the projects by default, still, just in case I am mentioning it to avoid any unforseen troubles.
Sample App
The sample app is nothing more than a basic app showing the usage of the library. If you have followed the steps above, there won't be any such need of you to run the sample app, still, if you want to see Easy-Binding in action, go ahead and run it. The app is included above, you just have to clone the project and run the app module.
Support And Feedback
- By making a PR on the repository as I know there are a lot better ways to do the same and would love to see your approaches.
- Connect with me on LinkedIn or GitHub.
- Star the Github repository.
- Follow me for more related content.
- Read the Medium Article if you'd like.
- Lastly share the library with your friends!